Briefly engage students in a discussion about the measurements of different trees:
What do you notice about the trees around us?
Are they all the same? How are they different?
What can you tell me about their height or thickness?
Explain that the measurement around the tree is called the circumference.
Select a tree and have the students brainstorm ways to measure the tree’s circumference.
Remind students that when comparing the circumference of different trees, the same material must be used to get an accurate comparison.
Remind students about the rules of measurement (ex. no spaces in between each unit, must start at the beginning of the measurement tool, must use the same material when measuring, must not overlap units)
As a class, choose one unit of measurement (ex. yarn) to measure the circumference.
Discuss why this may be the best unit of measurement.
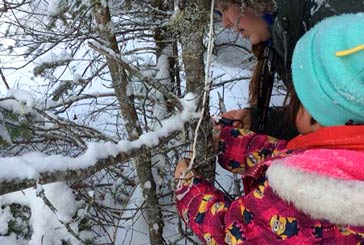
Demonstrate how to measure the circumference of a tree.
Place the yarn around the trunk of the tree. Cut off the amount of yarn that is used to surround the tree. Explain that this is a way to measure how thick the tree is.
In small groups, have students compare the circumference of their chosen tree.
Take each students’ yarn pieces and order them by length. Discuss:
Which group had the longest yarn?
What does this mean – did they have a tree that was thicker than everyone else’s?
Look Fors
Are students understanding the rules of measurement (ex. no space between each unit, must start at the beginning of the measurement tool, must use the same material when measuring, must not overlap units)?
How are students using measurement language to describe their findings (ex. thick, thin, wide, short, long)?
What strategies do students use to compare their circumference to the other students’ in the class?
Extension
Measure the yarn lengths with other units of measurements (ex. unfix cubes, markers, coins).
Transfer the information about the size of each tree on graph paper.
Tape each piece of yarn to a paper in a circular shape to recreate the circumference of the tree. This helps students visualize the cross-section of the tree’s trunk. Analyze each circle:
Which trees have the larger/smaller circumference? How do you know?
Can you name the trees that have greater circumferences (ex. cedars versus oaks)?
How would you describe these trees in real life?
If students are ready, introduce standardized units of measurement. Discuss how using yarn to measure circumference can be translated into standardized units of measurement.